Baja Designs 250W Stator install
Page 1 of 1
 Baja Designs 250W Stator install
Part 1 - Removal of stock stator

Getting setup: OK, this may be a little basic for anybody who's worked on bikes before but I'll keep it there for anyone who has not's sake. A dirtbike stand is a great thing keeping the bike level and steady while work is performed. If you don't have one, a cement cinder block or a upside down 5 gallon bucket works great too.
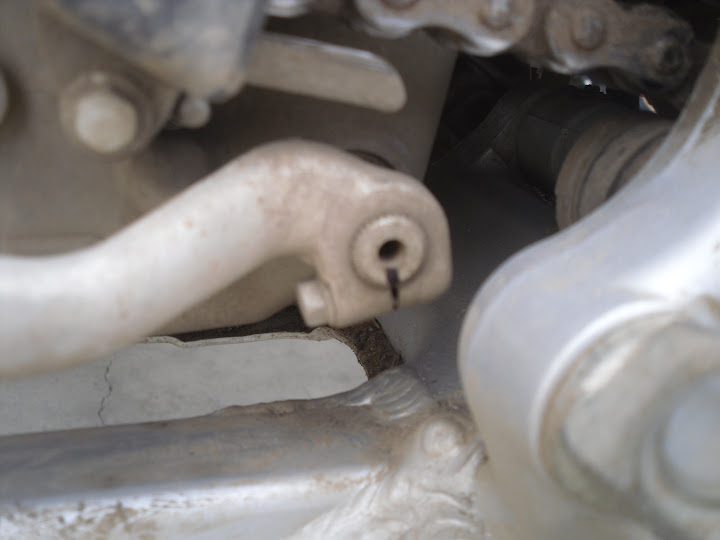
Shift Lever: I have always kicked myself for taking the lever off without marking it first (Sharpie pen) and fighting with it later to get it back where I'm used to it being at. Seems like a "Duh" thing but if you're in a hurry and not thinking ahead it makes more work later....
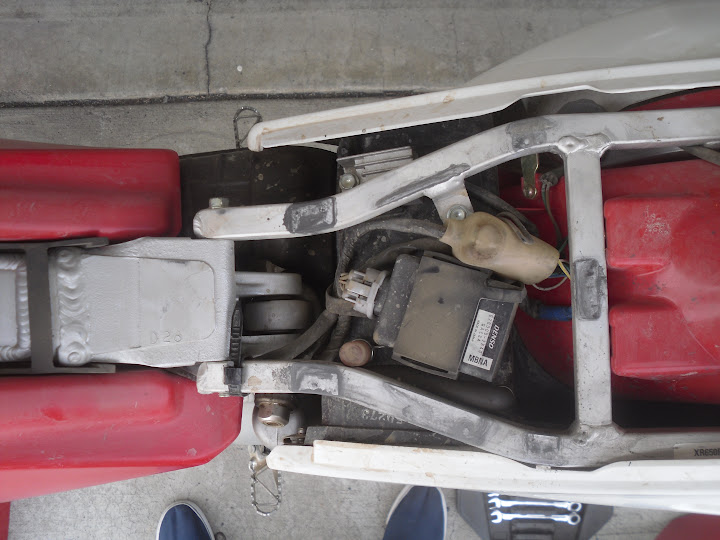
Seat removal: After the seat is removed make note of how everything is routed. Take a picture or use mine. It'll be a while before you get the stator back to re-install, don't count on remembering how it was routed. At this point I removed the zip tie holding the wires to the subframe.

Wire Routing: More referance pictures...

Wire Routing: With the gas tank removed. Note that the zip tie/cable tie has already been removed from the subframe near the upper bolt in this picture.

Cover: Only 4 bolts holding this on. Between the gasket, locating studs and magnets, there's a bit of resistance getting the cover off. There are are little tabs or ears near each of the bolts to pry against GENTLY with a small pry bar or allen wrench to pull it away from the engine. Try to remove it evenly. If you are patient and carefull it can be removed without damaging the gasket, cover or sealing surface of the engine case.
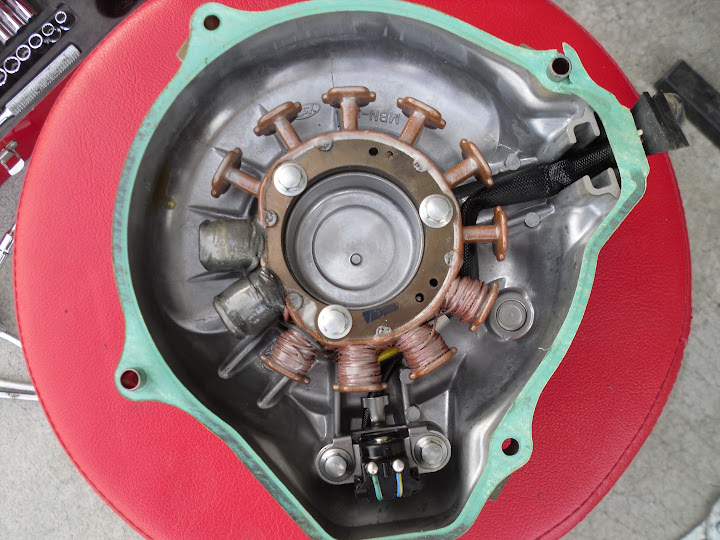
Stator: Make note of how everything is located. I ripped the gasket removing the rubber grommet for the stator wires but it might be better to slice it with a razor instead if you plan on reusing it. Either way a little bit of sealant will fix it up without a new gasket. Remove the three bolts hold the stator to the cover and the two holding the signal generator. You'll want to put the screws back in their holes after you have the stator out so you don't mix them up or lose them.
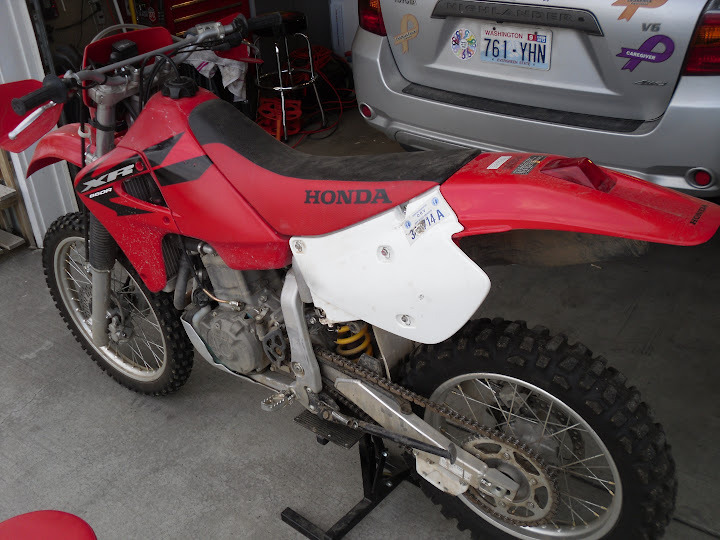
Waiting: May as well reassemble everything while it's fresh in your mind where it all goes. The fasteners don't need to be tight or torqued down as it won't be running without a stator anyway! It'll be a week or two at least before you get the stator back to re-install it. I left the shifter off as that one's pretty obvious where it goes, but I put the bolt back into it so I don't lose it.
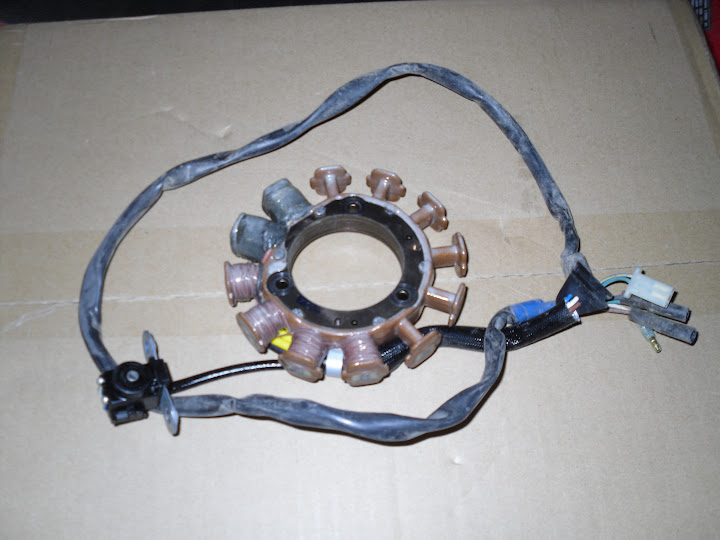
Shipping: Ready to ship out! A gallon size zip lock bag works well keeping it tidy.
Part 1 complete! More to come when re-installing.....
Getting setup: OK, this may be a little basic for anybody who's worked on bikes before but I'll keep it there for anyone who has not's sake. A dirtbike stand is a great thing keeping the bike level and steady while work is performed. If you don't have one, a cement cinder block or a upside down 5 gallon bucket works great too.
Shift Lever: I have always kicked myself for taking the lever off without marking it first (Sharpie pen) and fighting with it later to get it back where I'm used to it being at. Seems like a "Duh" thing but if you're in a hurry and not thinking ahead it makes more work later....
Seat removal: After the seat is removed make note of how everything is routed. Take a picture or use mine.
Wire Routing: More referance pictures...
Wire Routing: With the gas tank removed. Note that the zip tie/cable tie has already been removed from the subframe near the upper bolt in this picture.
Cover: Only 4 bolts holding this on. Between the gasket, locating studs and magnets, there's a bit of resistance getting the cover off. There are are little tabs or ears near each of the bolts to pry against GENTLY with a small pry bar or allen wrench to pull it away from the engine. Try to remove it evenly. If you are patient and carefull it can be removed without damaging the gasket, cover or sealing surface of the engine case.
Stator: Make note of how everything is located. I ripped the gasket removing the rubber grommet for the stator wires but it might be better to slice it with a razor instead if you plan on reusing it. Either way a little bit of sealant will fix it up without a new gasket. Remove the three bolts hold the stator to the cover and the two holding the signal generator. You'll want to put the screws back in their holes after you have the stator out so you don't mix them up or lose them.
Waiting: May as well reassemble everything while it's fresh in your mind where it all goes. The fasteners don't need to be tight or torqued down as it won't be running without a stator anyway! It'll be a week or two at least before you get the stator back to re-install it. I left the shifter off as that one's pretty obvious where it goes, but I put the bolt back into it so I don't lose it.
Shipping: Ready to ship out! A gallon size zip lock bag works well keeping it tidy.
Part 1 complete! More to come when re-installing.....
Last edited by DirtyErnie on Mon Apr 09, 2012 3:55 pm; edited 1 time in total

Guest- Guest
 Making the puzzle pieces fit....
While waiting for my stator to come home I thought I'd try fitting some bits and pieces into their new homes.
Before moving things around:

Took out the AC regulator as I'm going all DC and it's being replaced with the RickyStator 250W reg/rec. So the CDI moved to the AC reg spot. Just loosening the airbox bolt allowed it to slide in there and with the rubber sleeve around it still has some vibe damping. Tighten the bolt and it's locked in there. The Battery lays in the CDI's old spot nicely and has plenty of clearance. The fuse box goes in the spot the wire connector cluster sat in. Plenty of room under the side cover for the connectors and wires.
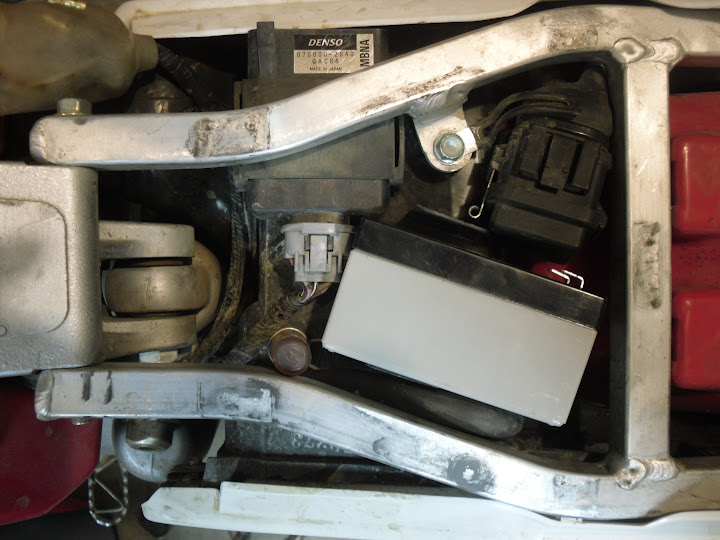
This is a fusebox I had laying around from extra stuff pulled off an old bike of mine. Should work PERFECT!

Forgot I needed a place for the RS reg/rec so the fusebox had to go elsewhere. The old bolt was too short and the AC regulator bolt that was removed is about 1/4 inch too long, a small stack of washers fixes that.

Where the fusebox ended up, not ideal but accessable if you loosen the clamp:

That's all for tonight!
Before moving things around:
Took out the AC regulator as I'm going all DC and it's being replaced with the RickyStator 250W reg/rec. So the CDI moved to the AC reg spot. Just loosening the airbox bolt allowed it to slide in there and with the rubber sleeve around it still has some vibe damping. Tighten the bolt and it's locked in there. The Battery lays in the CDI's old spot nicely and has plenty of clearance. The fuse box goes in the spot the wire connector cluster sat in. Plenty of room under the side cover for the connectors and wires.

This is a fusebox I had laying around from extra stuff pulled off an old bike of mine. Should work PERFECT!

Forgot I needed a place for the RS reg/rec so the fusebox had to go elsewhere. The old bolt was too short and the AC regulator bolt that was removed is about 1/4 inch too long, a small stack of washers fixes that.

Where the fusebox ended up, not ideal but accessable if you loosen the clamp:

That's all for tonight!
Last edited by DirtyErnie on Mon Apr 09, 2012 4:48 am; edited 1 time in total (Reason for editing : lack of proof reading!)

Guest- Guest
 Can BD stator run as single output?
I know the RS stator can be hooked up as a single output like this picture. Any reason a BD stator can't be hooked up the same way?
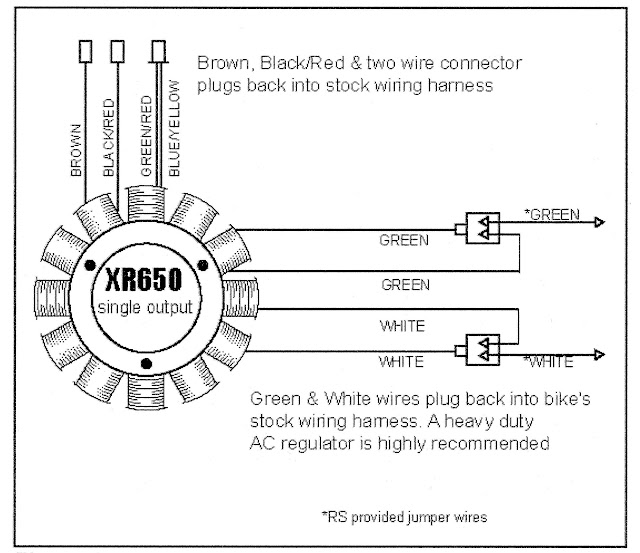
This is what I'm planning:
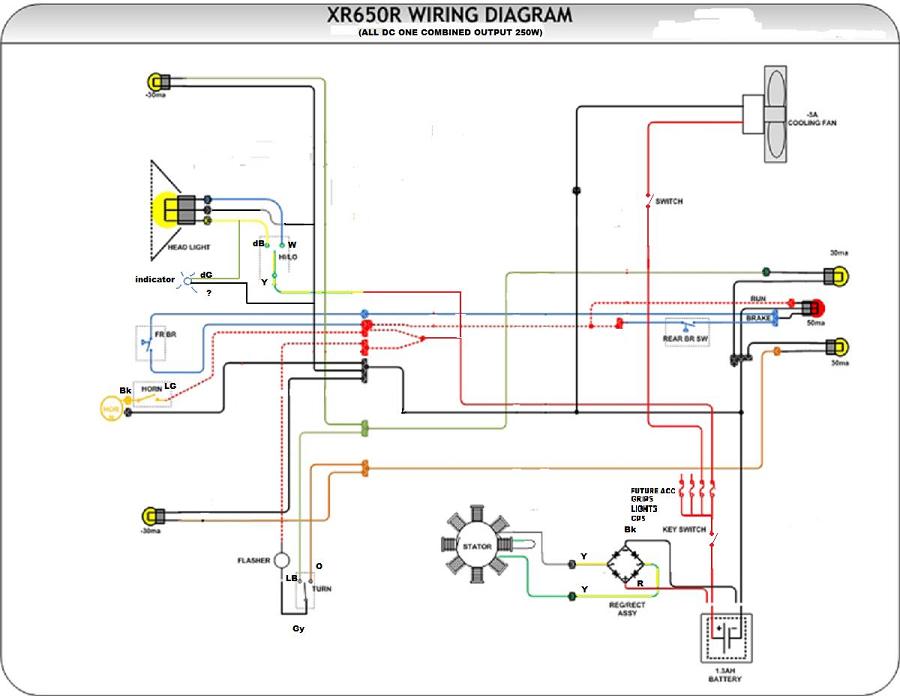
Larger Version of Diagram

This is what I'm planning:

Larger Version of Diagram
Last edited by DirtyErnie on Sun Apr 15, 2012 4:55 am; edited 2 times in total

Guest- Guest
 Re: Baja Designs 250W Stator install
I have a image size limit set...Link it to a larger pic where it's hosted for those who need to zoom.DirtyErnie wrote:hmmm... diagram was supposed to be bigger...

~Focker
 Re: Baja Designs 250W Stator install
Since you're going all-DC, this might be helpful. This is the wiring diagram I made for my XR-R.

Link to full-size image: https://2img.net/r/ihimizer/img600/2735/actualwiringrevised.png

Link to full-size image: https://2img.net/r/ihimizer/img600/2735/actualwiringrevised.png

Guest- Guest
 High Beam LED
I presume that's the K&S 12-0055 switch? Have you had it hooked up yet like this? I was trying to figure out how that LED terminal was supposed to wire in! Thanks! 

Guest- Guest
 Re: Baja Designs 250W Stator install
DirtyErnie wrote:I presume that's the K&S 12-0055 switch? Have you had it hooked up yet like this? I was trying to figure out how that LED terminal was supposed to wire in! Thanks!
I haven't wired it up yet, no. I based the wiring off of a .pdf instruction sheet I found for it, showing the wiring colors. It showed one of the leads as "Headlight Hi-Beam LED (wire to Ground)" or something to that effect, which tells me it is connected internally to the white (high-beam) output, and then needs a ground to light up.

Guest- Guest
 Re: Baja Designs 250W Stator install
Oh, guess I'll post this up too. I modified the previous wiring diagram to include the ProCycle ignition/kill switch. Also, as a side-note, there's an error in my previous wiring diagram (I'll try to edit it). The high-beam output from the handlebar switch should also be connected to the rear running light (using a diode to isolate the high and low-beam circuits from each other).

Direct link: https://2img.net/r/ihimizer/img856/5107/actualwiringrevisedswit.png

Direct link: https://2img.net/r/ihimizer/img856/5107/actualwiringrevisedswit.png

Guest- Guest
 Re: Baja Designs 250W Stator install
I think my running light will be on any time the key is. I can't think of any reason I'd turn it off when riding though so not a problem. Got a few more parts in today, the DRC LED taillight insert, rear signals and license light.
The LED insert came with tiny screws and washers that were bound to vibrate loose if not loctited. I went a different route.
 (yes, rivets)
And the new turn signals:
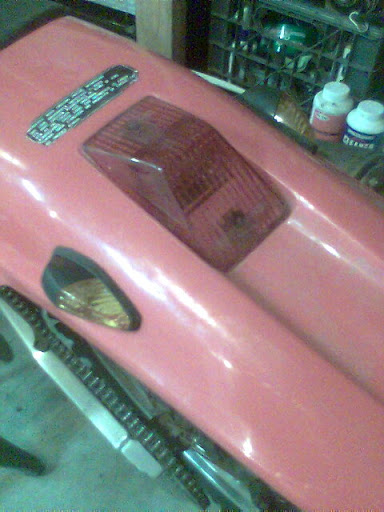
Tested them with the new battery and was happy with the brightness of them all.....
The LED insert came with tiny screws and washers that were bound to vibrate loose if not loctited. I went a different route.

 (yes, rivets)
And the new turn signals:

Tested them with the new battery and was happy with the brightness of them all.....

Guest- Guest
 Stator update
I don't know what the hell happened between the time I dropped the stator with the motorcycle shop to ship to BD for rewind and now. I just got in touch with BD directly today and they just got the stator yesterday! I gave the shop my stator like two weeks ago!! 


Anyway, the good news is even though I couldn't get them to answer a simple question:
"Can the stator be wired in (at the harness) for one 200W output when the stator is wound for two 125W outputs?"
Is that a confusing question for someone who deals with stators day in and day out??
They are winding it for a single output. Hopefully I won't need a second winding as a backup somewhere down the road.
I got my handlebars and brake switches today and priced a couple of things for the bike in the future at NAPA. I'm thinking a couple of these would work well as off road aux fork mounted flood lights:
http://www.napaonline.com/Catalog/CatalogItemDetail.aspx?R=BK_7355799_0361153365

At $12 a piece I wouldn't shed too many tears if I bust one. I have trail tested these on another rig I had, don't laugh, I horse traded for it and pieced it together for next to nothing and it worked great!


Anyway, the good news is even though I couldn't get them to answer a simple question:
"Can the stator be wired in (at the harness) for one 200W output when the stator is wound for two 125W outputs?"
Is that a confusing question for someone who deals with stators day in and day out??
They are winding it for a single output. Hopefully I won't need a second winding as a backup somewhere down the road.

I got my handlebars and brake switches today and priced a couple of things for the bike in the future at NAPA. I'm thinking a couple of these would work well as off road aux fork mounted flood lights:
http://www.napaonline.com/Catalog/CatalogItemDetail.aspx?R=BK_7355799_0361153365

At $12 a piece I wouldn't shed too many tears if I bust one. I have trail tested these on another rig I had, don't laugh, I horse traded for it and pieced it together for next to nothing and it worked great!
Last edited by DirtyErnie on Sun Apr 15, 2012 4:45 am; edited 1 time in total

Guest- Guest
 Progress..
I've got my wiring harness made up and installed but still waiting on parts to finish things up. Pics to follow soon.....

Guest- Guest
 more parts in!
Got my package from HDB yesterday. Have the guards installed with buttons, mirrors, blinkers, horn and flasher relay. Pretty much all that's left is the stator which is supposed to get here this week. Yeah!!!

Guest- Guest
 BD Stator install
A picture is worth a thousand words...
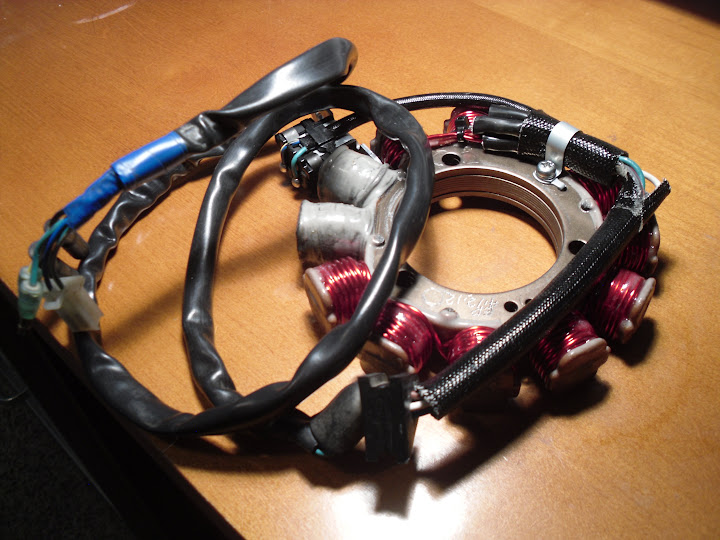
Supa-fresh rewind

Yes, they even use the grommet...

Ready to assemble, printed out instructions but ended up not needing them. Far as I can tell the extra clearance is not needed when wound as a single output. I carefully checked before bolting it all up!

Fixing the rip in the gasket with a dab of silicone, should be fine....
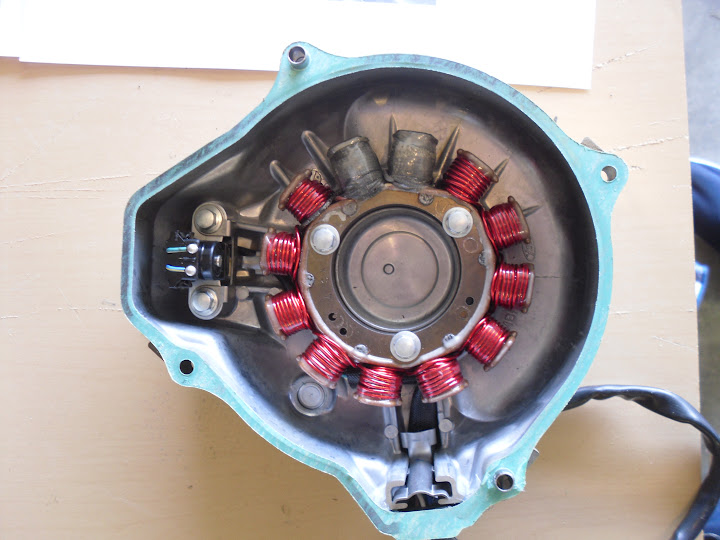
Signal generator and wire cover in place.


Routing the wires in the stock locations...

The long White/Yellow and Dark Green pair went to the AC reg, the Brown/Black and Dark Green pair went to the tail light and the White/Tan and Light Green are the new stator winding and go to the two yellow wires coming from the Reg/Rec (w/wirenuts and no there are no wirenuts used in my wiring, just temp caps in this pic!) Ultimately the White/Yellow, Brown/Black and the (Blue?) for the AC headlight (not in picture) all connect together elsewhere in the harness and are no longer used. I connected the White/Yellow and Brown/Black together and the two Dark Greens together and taped and tucked them into the cover, out of the way. The other wires here are pretty straight forward.

Supa-fresh rewind

Yes, they even use the grommet...

Ready to assemble, printed out instructions but ended up not needing them. Far as I can tell the extra clearance is not needed when wound as a single output. I carefully checked before bolting it all up!


Fixing the rip in the gasket with a dab of silicone, should be fine....

Signal generator and wire cover in place.


Routing the wires in the stock locations...

The long White/Yellow and Dark Green pair went to the AC reg, the Brown/Black and Dark Green pair went to the tail light and the White/Tan and Light Green are the new stator winding and go to the two yellow wires coming from the Reg/Rec (w/wirenuts and no there are no wirenuts used in my wiring, just temp caps in this pic!) Ultimately the White/Yellow, Brown/Black and the (Blue?) for the AC headlight (not in picture) all connect together elsewhere in the harness and are no longer used. I connected the White/Yellow and Brown/Black together and the two Dark Greens together and taped and tucked them into the cover, out of the way. The other wires here are pretty straight forward.
Last edited by DirtyErnie on Sat May 05, 2012 5:33 am; edited 1 time in total (Reason for editing : Added info)

Guest- Guest
 Done! (for now...)
I've got it in working order. There are a few things I'd like to tidy up later on down the road. But right now I want to go ride!! I need to get rid of the massive wiring and connector lumps under the seat and behind the headlight. The biggest problem I had was not being able to find any OEM style connectors in town and just made due with bullet and blade connections. So it's a little sloppier than I would have liked but it all works.


And how she sits now:


And how she sits now:


Guest- Guest
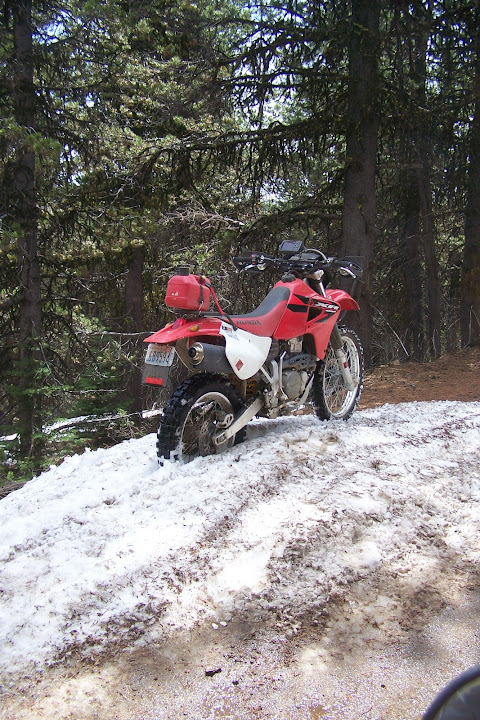
 Trail tested 200 miles!
She's been throughly tested and everything works great, no blown fuses, melted wires or dark rides home! (so far...)


Guest- Guest
 Similar topics
» baja designs generator/stator rewound?
» Wiring the Baja Designs Kit
» Baja Designs key switch ?
» 200w stator, What to install Regulator/Rectifier ?
» Baja Designs Dual Sport kit issues?
» Wiring the Baja Designs Kit
» Baja Designs key switch ?
» 200w stator, What to install Regulator/Rectifier ?
» Baja Designs Dual Sport kit issues?
Page 1 of 1
Permissions in this forum:
You cannot reply to topics in this forum


